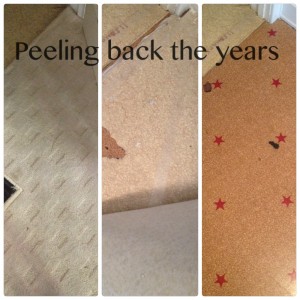
One of the best things from our last two projects was uncovering original flooring. Most houses that were built prior to 1940 seem to have amazing flooring in them just dying to be uncovered. We will never understand why over the decades these floors get covered with layers and layers of linoleum and carpet.
When walking through these older homes, we always try to peek under the ‘visible’ flooring to see if there are original wood floors underneath as this proves to be a cost savings as well as a value increase for the house.
How do I go about restoring original flooring?
Obviously, step one is unveiling the original floor. We always find this entertaining as you peel back the different decades of flooring. Based on the patterns, you can almost decipher if you are in the 50’s, 60’s, or 70’s. 🙂 One word of caution, if there is individual tile measuring 9×9, they likely have asbestos backer. You do NOT want to mess with asbestos. Always be sure when tearing up old carpet and linoleum to wear a ventilated mask. You will most likely need to rent a small dumpster to dispose of your multiple layers of historical floor.


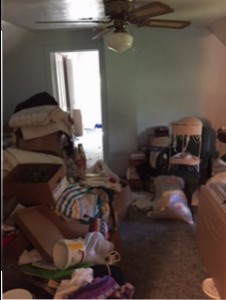
floor was even in this room, but the same gross blue carpet carried through.
Once you have revealed your hopefully soon-to-be amazing flooring, the bigger mess can commence……sanding.
We rented a drum floor sander to do the entire upstairs of our last project. Now don’t think that you can just go over the floors in one swipe. That would be far too easy! You will need to sand the floors multiple times with different grit paper. If your previous flooring layers left you with glue, residue, or even if the floor has multiple layers of paint, you will need to start with a rough grit. We started with 50 grit and then worked our way to finer grits. To do around the edges, we used a belt sander with a make shift bag. Again be sure to wear a ventilated mask. When the sanding is complete, your floors will look beautiful and your ceilings, trim, doors, and walls will look like a disaster. Even though sanders have a dust bags, the dust still flies EVERYWHERE.

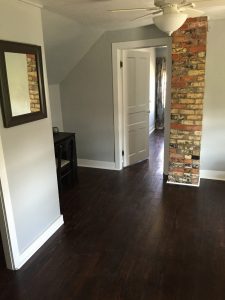
Once clean up is complete, you will have to decide if what to do with your floors. If you like the natural look and your floors are flawless, you could simply apply multiple layers of polyurethane for your finish. Some like the look of medium or dark stain and then polyurethane. We went for the dark stain for both of our previous projects and they turned out gorgeous!


What is the cost of new flooring vs restoring?
If you were to purchase new, durable flooring, best to estimate about $100/sq. ft. There are all kinds of flooring to choose from so your cost may be slightly different whether you choose linoleum, laminate, or real hard wood. You will want to also figure additional cost if you plan to have someone to do the work for you.
Our first project house, we hired out the sanding and finishing. It took him about a week to get the approximately 800 sq ft done and we paid about $3000.00. We were on an extremely tight timeline so the possibility of doing them ourselves was not even an option.
Our second project house breaks down to the following since we did all the work:
- Dumpster: $285
- Cost to rent the sander (including paper)$100
- Stain:$45
- Poly:$45
- Stain applicators: $15
TOTAL: $450.00
Have you had ‘flooring success’?
[…] Download Image More @ http://www.vhhomeflips.com […]